Digital Space Organization: 5 Easy Tactics to Implement
Learn how to declutter your desktop and create calm with our 5 tactics for digital space organization!
In an era where most of us work and produce using a computer or a phone, having the digital space in place is as important as keeping an organized physical environment. The time wasted looking after files drives anyone nuts. Besides, oppositely to what happens to your physical space, there is no limit to what you can store. Things simply pile up… very quickly. You certainly feel overwhelmed with 10 different sheets of paper placed on your desk. But how do you feel about 10 documents on your desktop? It is not a big deal… Until it is.
Marcus Aurelius once said: “You see how few things you have to do to live a satisfying and reverent life?”
I truly believe he was referring to your digital space organization. Read on to learn 5 tactics for organizing your digital space:
Why digital space organization matters
When your digital space is organized, you see things clearly, you procrastinate less, and you can be more productive throughout the day. The feeling of accomplishment that comes with having your digital space organized has several positive consequences in your life. After all, and as Benjamin Franklin put it,
“For every minute spent in organizing, an hour is earned.”
— Benjamin Franklin
Organization seems like a small piece, and it is. But it is a small piece that impacts meaningful and ambitious projects. The 5 next tactics will help you get your Digital Space into proper order.
5 Tactics for Digital Space Organization
- Use the Tree Structure Method
- Download files without disorganizing
- Favourite items for quick access
- Save articles without cluttering
- Manage your screenshots efficiently
1 Use the Tree Structure Method to organize files
How does your desktop currently look like? If there are more than three items on it, you certainly need to follow this first organization tactic.
All your files should be inside folders, which means you should begin by creating all the necessary folders for your digital space organization. Here are some examples of folders: Work, Management, College, Team, Marketing, HR, Media, Personal, Projects, Blog, Social Media, Screenshots, Finances, etc.
Then, use the Tree Structure method to continue adding to this level of organization: several branches come from the main branch. That is, each folder fits inside another.
Here is an example: Filipa -> Media -> Photos -> Travel -> Japan -> Kyoto. This seems pretty obvious and straight-forward but when I don’t make an effort, my desktop looks like a Japan’s photo album.

When your folders are all fitting into each other, place your documents, files and apps inside. Basically, you are building a tree structure organization in which every item is set within a bigger context.
By following this approach, not only is it easier to find files, but you also avoid turning your wallpaper into a crowded mess.
2 Download files without disorganizing your desktop
The folder that gets out of control the fastest is the “Download” folder. A couple of weeks is enough to make it look like a horror movie. And although you can’t excuse it from happening, it’s not entirely your fault. This folder was designed to be the accumulation of stuff — every time you hit the “download” button, it will go there. But I’ve found a way that is helping me maintain my “Download” folder (almost) empty.
Rather than making it the default folder when downloading a file, I have to select the folder on which I want the files to be saved. This can be done by enabling the option that says, “Ask where to save each file before downloading.” This is an excellent trick for maintaining your organization system in its order and can be used in most browsers.

With this tactic, you get to maintain your Tree Structure intact — all downloads will be kept inside their proper folder instead of piling up in your Downloads.
3 Favourite items for quick access
I get it. One of the reasons you might resist organizing your files and folders logically is that it might increase the time it takes to reach the files you use on a daily basis. After implementing the Tree Structure method, I had to open the main folder “Filipa”, then “Media”, then “Courses”, then “[name of the course]”, then “Script”, and finally, the document. Even though the structure was the proper one to maintain the system, I figured an easy way to access the most used folders.
I simply add the most used folders and files to my “Favorites” and save a ton of time navigating through folders. This can be done both on Mac OS and Windows.
You don’t have any excuses now!
4 Save articles without cluttering your desktop and tabs
Most of my time is spent creating — blog posts, courses, books, emails, etc. And one crucial part of a creator’s life is consuming and filtering existing content. This means I’m constantly on the lookout for new ideas and inspiration from other creators. And… it also means I was always opening dozens of tabs and saving pdfs. Not recommended.
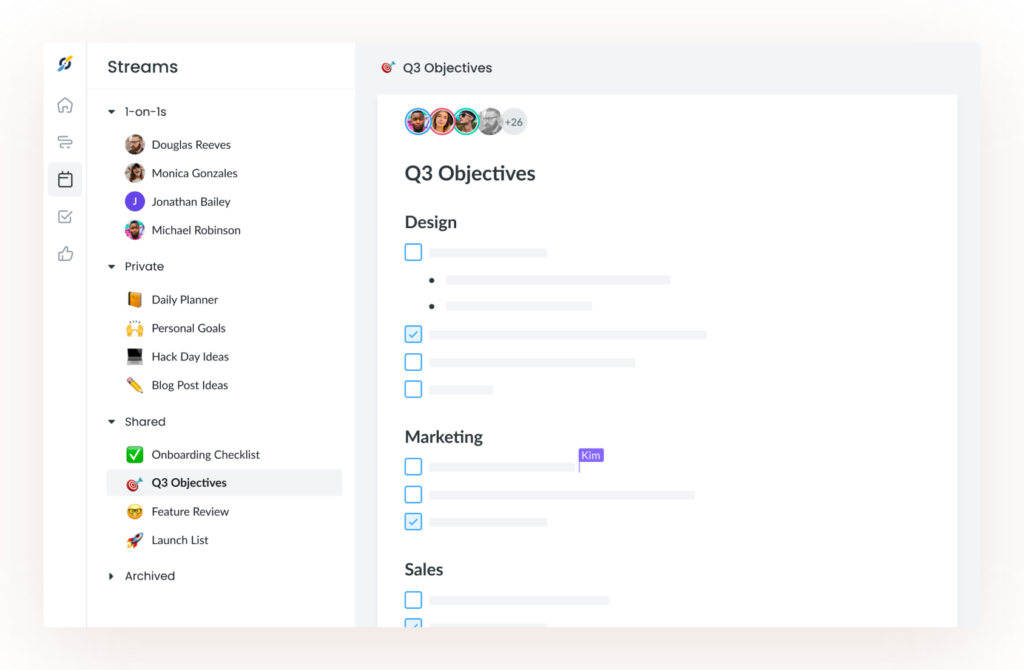
But there is a way to avoid this from happening – Fellow Streams! It is a great way to save articles and other resources in an organized manner. Streams can also be used as digital notepads for brainstorming, journaling, or a daily planner!

Pro tip
Use a meeting management tool like Fellow to organize your meetings and personal or professional notes with streams! Bonus: streams can be private to you or shared for collaborating!
5 Manage your screenshots efficiently
How many screenshots do you take daily? I don’t know either but it’s surely more than you can handle. Especially when your screenshots are saved automatically on the desktop…
I spent the whole day taking screenshots of inspirational websites. However, all screenshots I took with my Mac went straight to the desktop, causing a huge mess. After a quick web search and following a tutorial, I managed to save my screenshots into a specific folder, which I named “Screenshots”.
Here’s how to do it on Mac:
- Create a new folder called Screenshots
- Open the terminal and paste the following code: defaults write com.apple.screencapture location
- Place your cursor after location and drag your Screenshots folder into the Terminal, so the path of the folder will be added into the text
- Press enter!
Now every time you hit Cmd + Shift + 3, your screenshots will be added to the dedicated folder. Click the video below for a walkthrough explanation!
Conclusion
With these 5 tactics in mind, your digital working space should look its best in no time!
But don’t forget: You must respect the organization structure you created. Otherwise, your digital space will end up as it was, messy and confusing! The key to building an organized space is engaging in the necessary discipline to maintain it that way.
-
 Productivity
How a Digital Declutter Can Lead to a Better Digital Life
7 minute read -
Meetings
10 Organization Ideas for Your Digital Notes
6 minute read -
Productivity
How to Be Organized at Work and Stay on Top of Things
11 minute read -
Meetings
Product Meeting Ideas: 5 Tactics to Run Remarkable Meetings
6 minute read -
Supermanagers Podcast
Ross Mayfield: How to Run Pre-Mortems and Super-Efficient Meetings
8 minute read -
Meetings
How To Organize Meeting Notes Efficiently (5 Tips)
6 minute read -
Productivity
Best Organization Tools For Work to Improve Productivity
6 minute read -
Productivity
Boost Your Productivity With 16 Top Fellow Integrations
7 minute read -
Productivity
Decision Tree Analysis: How to Make Effective Decisions
9 minute read


-
Planning User Testing Meeting Template
-
Sales Team Brainstorm Meeting Template
-
Design Team Training Meeting Template
-
Brand Awareness Campaign Kick-Off Meeting Template
-
Assistant Deputy Minister Policy Meeting Template
-
Failure Modes and Effects Analysis Template
-
Win-Loss Analysis Meeting Template
-
Design Brief Meeting Template
-
Marketing Planning Meeting Template